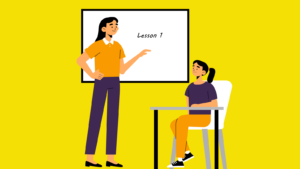
Monster Eyes – Using the Power of Modelling
My daughter was determined to wear her monster beanie to school. She wouldn’t let me help her put it on since she was in the “No mommy, I do it myself!” phase of toddlerhood at the time. I loaded her into the car. As we pulled away, she got a glimpse of herself in the rearview mirror. “Oh no!” she cried, “I can’t see the monster eyes!” She realized that her monster hat was on backwards. Still not allowing me to help her, I proceeded to start the 25-minute drive to her preschool. I did, however, aim the rearview mirror completely in her direction as she requested 6 times before I gave in. (One can only hear, “Mommy, please can I see?” so many times from an over anxious 2-year-old).
My daughter would repeatedly take the monster beanie off, look at the monster eyes, check in the mirror and put the beanie back on. Each time she attempted to put the monster beanie on her head, it ended up backwards. After what seemed like the millionth attempt, she cried out of frustration. I wanted to cry with her!
Eventually, she calmed down enough to accept my offer to help. While driving, I verbally explained how to turn the monster beanie in the right direction. Sounds easy, right? After trying different vocabulary – turn it around, backwards, upside down, left hand, right hand, that way, other hand, flip it – the monster beanie seemed to be destined go on that little girl’s head backwards. I finally gave up. I too was frustrated that I was unable to help her be successful.
When we pulled into the preschool parking lot, I faced her and modeled step-by-step how to put the monster beanie on my own head. Not only did I verbally explain it using the appropriate vocabulary, but I also made sure to provide a visual for her by modeling and acting out. I handed her the beanie and took a deep breath in anticipation. On the first try, she was able to place it on her head facing the correct direction! She checked herself in the rearview mirror and exclaimed, “I see the monster eyes!”
I thought of all of the English Language Learners sitting in classrooms listening to verbal explanations, while struggling to comprehend the content. The simple strategy of modeling with the use of visuals goes a long way. Not only will modeling and the use of visuals increase students’ comprehensible input, but it will also decrease student and teacher frustration. According to Hattie’s Ranking (2015), effective direct instruction, which includes modeling, has an effect size of 0.60. Keene and Zimmerman (2007) reaffirm the importance of modeling by saying that when teachers model, “teachers create a classroom environment conducive to in-depth learning- an environment that is comfortable and encourages conversation and reflection” (p. 147).
The key to modeling is not just using verbal explanations, but also nonlinguistic representations. Hill and Miller (2013) remind us that nonlinguistic representations allow all students to access the information without having all of the necessary words. Here are just a few ways teachers can use nonlinguistic representations while modeling:
Use Pictures
Even if you aren’t the best artist, draw pictures and illustrate your thoughts on paper. Drawings and pictures are great additions to anchor charts as well. Printing pictures from a variety of resources is an option for those who have an aversion to drawing.
Incorporate Props and Realia
Realia brings thoughts to life! Teachers can not only use real objects, but they can also create physical models. Students can then tie vocabulary to a real life object, increasing the comprehensible input. One of my favorite books to illustrate how this looks in lessons is Comprehension Connections: Bridges to Strategic Reading by Tanny MacGregor.
Include Kinesthetic Movement
Not only should you use real objects when you can, but allowing the students to get their hands on those objects will help them synthesize what you are teaching. Another hands-on approach is to have students complete the task as you are teaching. For example, if you want students to construct 3D shapes, you can have them build with you step-by-step. Kinesthetic movement also includes acting out, associating movements with vocabulary, and allowing students to physically participate. EdWeek has an article on the benefits of movement in the classroom.
Create Anchor Charts
Anchor charts are a great way for teachers to make a concept visible for students. Anchor charts should be available for students to refer to and use when they need it. Pictures, diagrams, and charts can be great additions to anchor charts! EngageNY provides a reference for anchor charts.
Think of a lesson you are about to teach. What types of nonlinguistic representations might you use? What type of modeling would be beneficial to students? Little changes can make a world of difference!
References
Hattie, J. (2015). Hattie effect size list – 195 Influences Related To Achievement . Retrieved November 09, 2016, from http://visible-learning.org/hattie-ranking-influences-effect-sizes-learning-achievement/
Hill, J. D., H., & Miller, K. B. (2013). Classroom Instruction that Works with English Language Learners, 2nd Edition. Alexandria: Association for Supervision and Curriculum Development.
Keene, E. O., & Zimmermann, S. (2007). Mosaic of thought: The power of comprehension strategy instruction. Portsmouth, NH: Heinemann.